


Multifamily Access Control Integration Guide in 7 Easy Steps
Why Multifamily Is Different
Apartment buildings and residential complexes have requirements that set them apart from commercial access control projects. High tenant turnover means credentials are constantly being issued and revoked. Residents expect convenience above all else — they will not tolerate a system that adds friction to entering their own home. And building managers need a solution they can administer without specialized security training.
Getting these deployments right requires a structured approach. Here are seven steps that consistently lead to successful multifamily access control installations.
Step 1: Survey the Building and Map Entry Points
Before selecting any hardware, walk the entire property and document every entry point that requires control. This typically includes:
- Main lobby entrances and exits
- Parking garage gates and pedestrian doors
- Elevator access (floor-level restrictions)
- Amenity spaces — gym, pool, rooftop, co-working areas
- Mail and package rooms
- Service and maintenance entrances
- Individual unit doors (if included in scope)
Note the door types, frame conditions, power availability, and network infrastructure at each location. Multifamily buildings often have older construction with limited wiring paths, so identifying these constraints early prevents costly surprises during installation.
Step 2: Define Access Zones and Resident Roles
Group entry points into logical zones and define which resident categories can access each zone. A typical structure might include:
- All residents — lobby, mail room, general parking
- Building-specific residents — their building’s elevator and corridors in multi-building complexes
- Floor-specific residents — restricted elevator access to their assigned floor only
- Amenity subscribers — gym, pool, or co-working access for residents who have opted in
- Management and maintenance — full access to all areas including mechanical rooms and service entrances
This zone-and-role mapping forms the foundation of the entire system configuration.
Step 3: Select the Right Credential Technology
Multifamily environments favor convenience and low maintenance. Mobile credentials are increasingly the preferred choice — residents always have their phone, credentials can be issued remotely before move-in day, and there are no physical cards to produce, distribute, or replace.
However, a purely mobile approach may not suit every building. Consider offering multiple credential types: mobile as the primary option, with key fobs or cards available for residents who prefer them or lack compatible smartphones. Ensure the selected readers support all chosen credential formats.
Step 4: Plan Intercom and Visitor Management
Visitors are a constant in residential buildings. The access control system should integrate with an intercom or video intercom at main entrances, allowing residents to verify and admit guests remotely from their smartphone or in-unit station.
Temporary access credentials for regular visitors — dog walkers, cleaners, family members — reduce intercom traffic and improve the resident experience. These credentials should have configurable expiration dates and time restrictions.
Step 5: Address Network and Power Infrastructure
Multifamily access control systems require reliable network connectivity between controllers and the management platform, and consistent power to all readers and lock hardware. Plan for:
- Network switches and cabling routes between floors and buildings
- Backup power for controllers and door hardware to maintain access during outages
- Sufficient bandwidth if the system uses cloud-based management
- Physical security of network equipment in common areas
Coordinate with the building’s IT infrastructure early. Retrofit projects in older buildings often require creative solutions for cable routing.
Step 6: Configure, Test, and Commission
With hardware installed, configure the system according to the zone and role mapping from Step 2. Test every door, every credential type, and every access scenario before going live:
- Resident access to authorized areas at permitted times
- Denial of access to unauthorized areas
- Intercom-to-mobile visitor flow
- Temporary credential issuance and expiration
- Emergency egress and fire alarm integration
- Management override and lockdown procedures
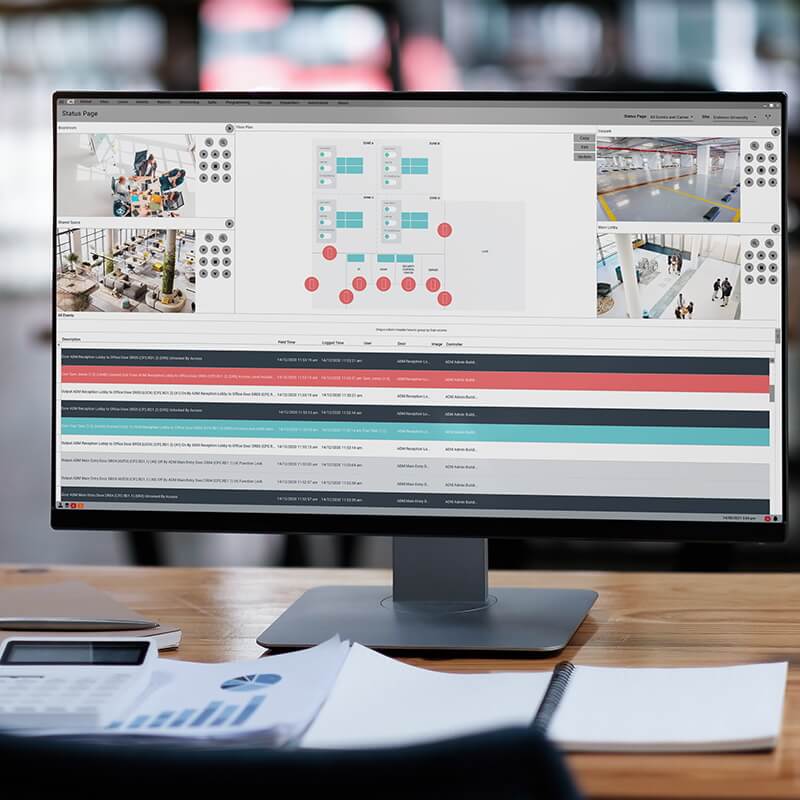
ICT’s Protege platform streamlines this process with intuitive configuration tools and real-time event monitoring during commissioning, allowing integrators to verify every access point from a single interface.
Step 7: Hand Over and Train Building Management
A successful installation ends with a confident building manager. Provide clear documentation and hands-on training covering:
- Adding and removing residents
- Issuing and revoking credentials
- Managing visitor access and temporary credentials
- Reviewing access logs and generating reports
- Basic troubleshooting for common issues
Protege’s web-based management interface is designed for non-technical operators, making it straightforward for property managers to handle day-to-day administration without calling the integrator for every change.
Setting Residents and Managers Up for Success
Multifamily access control is ultimately about delivering a seamless living experience while giving building managers the tools they need to maintain security with minimal effort. Following a structured integration process ensures the technology serves the people — not the other way around.